BRAKES
BRAKE SYSTEM CALCULATIONS
By Dave Mumert
Don't get
too excited
about wider drums and bigger pads.
The formula for brake torque on a disk
brake system is
Torque = (Brake Pressure) X (Piston
Area) X (Effective Rotor Radius) X (Pad Coefficient of friction) X 2
Notice there is no mention of pad area. The coefficient of friction (u)
is measured in force per square inch per pound of pressure
So a 80 mm caliper (about 7.8 square inches) with 1000psi of
brake pressure will put 7800 pounds of force on each pad.
A 10 square inch pad will have
7800/10=780 pounds per square inch - so force will be 780 X u X 10
square inches or 7800u
A 12 square inch pad will have
7800/12=650 pounds per square inch - so force will be 650 X u X 12
square inches or 7800u
Larger
pads should last longer and may fade less but they don't provide more
brake torque. The same applies to wider shoes on the rear.
You can get more braking by:
1 - Increasing brake pressure - not easy without changing the booster
2 - Increasing pad friction - pretty easy
3 - Increasing rotor diameter - very difficult
4 - Increasing caliper piston size.
Going to 80mm calipers
and rear disks may force you to use a larger bore master cylinder which
will reduce your available brake pressure.
Here are the data for various Master
Cylinder and Caliper sizes
GMCBrakeCalcs.pdf
Here is the actual spread sheet so that
you can vary some of the assumptions
(load this file and run it in Excel)
GMCBrakeCalcs.xls
If you are serious about brakes you should
get some reading material and be sure you understand what is involved.
http://www.amazon.ca/Brake-Handbook-Fred-Puhn/dp/0895862328
I'm with you on this, the rear brakes need
some help. I would look at sticky pads (see Jim K) and maybe a
hydra boost system. The system to get rid of the brake torque
from the bogie arms looks like a good place to start. (see Jim
K)Dave M
SUMMARY CONFIGURATIONS
J.R. Wright
|
FRONT |
REAR |
| 1 |
70MM calipers |
drums with asbestos shoes with standard 15/16"
slave cylinders |
| 2 |
80MM calipers |
drums with asbestos shoes with standard 15/16"
slave cylinders |
| 3 |
70MM calipers |
drums with Carbon Metallic shoes |
| 4 |
80MM calipers |
drums with Carbon Metallic shoes with 1 1/8"
slave on middle
bogey/15/16"slave on the back |
| 5 |
70MM calipers |
drums with asbestos shoes on the rear bogey with
15/16"
slaves, Disk brakes with asbestos or carbon metallic pads on the
middle bogey |
| 6 |
80MM calipers |
drums with asbestos shoes on the rear bogey with
15/16"
slaves, Disk brakes with asbestos or carbon metallic pads on the
middle bogey |
| 7 |
80MM calipers |
Disk brake package installed on both rear bogeys
with asbestos
or carbon metallic pads |
7. This setup uses several combos of Calipers on the back
bogey,
one would be using the Cadillac 70mm with the mechanical parking brake
or the 70mm calipers from the front of the coach or from the 1984 BOP
cars.
By the way BOP means Buick/Oldsmobile/Pontiac. An 80MM is used on
the middle bogey and is the same unit that was used on the front
brakes.
The disk brakes could be the Cadillac Eldo system, Harrison brake
system,
TSM or others
As for master cylinders the stock unit will work with most
applications.
The installations with the larger slave cylinders and calipers would
benefit
from the use of a Chevy P-30 master cylinder that has more volume.
This list is by all means is not complete and many other parts have
been used to modify and update the GMC's braking systems.'
You need to understand what you need before you start. Most
people
that have done the cad rear brake conversion do not use the cad
calipers
with the emergency brake feature. It has a tendency not to
release and the rear brake stays locked. The base set up is the
80MM
calipers on the front and middle bogey and the 70MM on the rear.
The 70mm are the same unit that the front uses as stock. As
for an
emergency brake some use a line lock valve that you set when you
push
down on the brakes. I recommend the carbon metalic pads on all
locations
http://www.gmcmotorhome.com/commodore/front_brake/index.html
http://gmcgreatlakers.org/GMCGreatLakers/Technical/CadDisk-Brakes/GMC%20Disk%20Brake%201.html
The second shortcut has a parts list near the end.
If you decide that you what to use the cad rear calipers with the
brake
lever you must find and old set to use as a trade in because you need
the spring and arm assembly to hitch up the cable. The rebuilt
units do not come with the spring and arm assembly and they are
difficult
to
buy. Take a good look at all the pictures. J.R. Wright
*************************
I promised information about the pre- and post-78 brake caliper
dimensions.These came from the 78 Eldorado calipers I've got off of the
rear of my coach and from the 80 Monte Carlo calipers I'm about to
install, eyeballedwith my 6" vernier caliper:
Mounting Piston
Width Diameter
78 Eldorado: 5.355"
2.98"
82 Monte Carlo: 3.75" 2.35" (60mm)
Ken Henderson
HYDROBOOST BRAKE
CONVERSION
The biggest problem doing the
installation seems to be the necessity for modifying the actuator
(pedal & cross-shaft). The Hydroboost extends much farther
into the cockpit than does the OEM booster. That calls for moving
the cross-shaft aft (where the OEM dash interferes), and/or extending
the bellcrank. And the HB must be mounted lower on the firewall
to make room for the MC to clear the front "hood". GMCwiperman kenH
A diesel PS reservoir is desireable because it's got a second fluid
return line, but it's not essential; most have no trouble with a tee in
the single return.
The P-30 MC fits just fine on the HB but it may have to mounted a
little lower that the OEM would require since its reservoir is taller.
ORSIT Ken H.
I had the HB custom made for me, there are at least 10 or 12 ways to
build one up, depending on the application and how much stopping power
is needed. Too lengthly to explain here, but you need a large power
piston and the small reaction piston to give you the pressure with the
least amount of pedal pressure to do the job right for the MH. The one
off the Astro van is NOT the one you want on the MH, it is not set up
correctly for the MH. I did a Power Point at one of the GMCMI
conventions on my installation.
You can view some pics here;
http://www.gmcmhphotos.com/photos/showphoto.php?photo=20252
----------------------------
Make sure you have a good power steering pump, as that is
necessary to furnish the needed hydraulic pressure for the Hydro-boost.
The OEM Saginaw P2 pump for the MH will be OK, you can test the output
pressure by the instructions in the MH manual. Pressure from the pump
is supplied to the hydroboost, and then on to the PS unit. I would
recommend two returns on the pump canister, as you do not want to have
interference with the return fluid on the spool valves. The early to
mid 80's vehicles with the 350 Diesel had these, if you have a good
pump, just switch the canister to your good unit, or braze a return
nipple on the canister you have.
I worked with Tim at Precision Rebuilders in St Clair, MO to build up
my unit.
http://www.precisionrebuilders.com/tech_support.html
This is what I have in my unit;
Input (reaction) rod size= .545"
Power piston diameter= 1.56"
Lever ratio of .72 to 1
Accumulator volume= 3.0 cu in
Use the shortest pedal rod you can get.
The unit comes into the cockpit area further than the vacumnn booster,
approx 1-5/8" more, but that was no problem for me with a custom made
dash. You can do the math on changing the pedal ratio, I changed mine
from the 4 to 1 to 5.5 to 1.
Make sure all your braking components are in excellent shape, as, if
done correctly, there will be increased brake hydraulic pressures. BOBD
------------------------------
A couple of weeks ago I tore down a Hydroboost just for
curiosity. Pictures are at
http://www.gmcmhphotos.com/photos/showgallery.php?cat=5009
if you're
curious also. Ken Henderson
-------------------------------
A note of caution, it may be necessary to replace all brake lines.
The
Powermaster (and Hydroboost) delivers considerably more line pressure
to the system than the stock MC and vacuum booster, so your lines must
be in excellent condition. Failure to replace rusted or otherwise
compromised lines could result in lines bursting under pressure,
possibly when you need them the most. JWID Larry :)
THIRD BRAKE
LIGHT(6/6/05)
I noticed on their web page an interesting collection of center
brake lights.(purchashed from Scott Nehoda see below) I picked on
that mounted on the surface, looked reasonably stock, and that was a
sealed LED unit.
Installing it was pretty easy. I also got the brake light module
they sell that solves the problem of not having a clean brake-light
circuit in the back. This module will light the center brake light at
any time both turn circuits are energized, and then latch it on until
both turn circuits are de-energized. It works like a charm.
Here are pictures:
PRESSURE BRAKE BLEEDING /
FLUSHING
As most all of us have changed the master cylinder, you would
have
a spare lid. I braised on a nipple to feed fluid under pressure from a
can. You don't need much pressure. If you have too much, the top will
leak.
I have that top to loan , if anyone wants to use it. Dean Hanson
This note came through over the GMCnet and no one commented.
Yet
it is one of the great ideas of the year. GMCs are known to be
difficult
to bleed the brakes. The combination of Gravity and Brake Peddle
seem to be the most successful but requires a lot of patience and is a
two person job. Pressure bleeding has been used for years by
manufacturing
and truck and brake shops. The problem is getting the proper
equipment.
This is a low cost way to build your own Pressure Brake bleeding
system.
The really keen part of this tool, is the siphon to return the fluid to
normal level after filling.
This is especially useful when you want to flush all the fluid in
the
whole system. It takes a lot of fluid and a lot pumping if you
are
using the brake peddle.
Click here to
read
about:
The Making of the
Inexpensive Brake Pressure Bleeder
I would add only one feature. There used to be a kit that was
called Easy Bleed. He used a spare tire (could be one of those
Mickey
Mouse skinny spares) for the air source. This has the advantage
of
a large volume of air at a constant pressure that you can set with your
air compressor. The tire will have enough air to do the whole
rig.
Gene
---------------
One advantage of pressure bleeding is that master cylinders often seem
to have a tendency to fail soon after brakes are bled bny pumping the
pedal.
That is due to people pushing them all the way down to the floor when
opening
the bleeder valves. This allows a portion of the master cylinder
seals to ride farther down into the bore than they normally
would.
Sometimes there is surface residue on the bores in this area that can
scuff
the seals and then they will subsequently begin to leak.
If one is going to bleed by having someone pump the brake pedal, it
is a good practice to put a 3/4" board on the floorboard under the
pedal
so that the pedal can never go all the way to the floor. Emery
BUILDING A GMC BLEEDER
I went to a junk yard and got a MC cover off of an old GMC truck with
the
same type of cover. Bought two cover gaskets from NAPA ....came
off
of their "HELP" display. You need two gaskets to get the cover to seal
under the 10lbs of pressure provided by the insect/weed sprayer. You
must
cut the center out of the two sides of the two gaskets, drill two holes
in the top of the recycled cover for brass fittings to accept the hose
from the sprayer, screw some self tapping sheetmetal screws with
silicone gasket cement on them into the vent holes in the cover, and
seal
the inside of the cover around the brass fittings with silicone.
Then you need a "Y" or "T" fitting to split the
fluid to both sides of the MC, and put screw clamps on the hose
connections.
Then put about 2 quarts of fluid in the sprayer, bleed the lines going
to the MC cover, clamp the cover on the MC, pump it up to 10 lbs. and
start
bleeding. It works GREAT!! Only need one person to do it.
10 lbs is enough to expand the pistons in the calipers and WC out to
make contact with the discs and drums.
I used Super Blue Racing Brake Fluid.
http://www.shotimes.com/SHO3brakefluid.html
Color of the fluid is Blue, so that as you bleed, when it turns to
blue,
you know that the old stuff has passed out. Building the Bleeder was
the
hardest part of the project.....my old hoses came off
easy....lucky
me!! Larry :-)
80 MM Front Brake Caliper
Upgrade
80 mm Caliper numbersJim Wagner suggested the 84 1/2t 2wd
Suburban
with JB7, JD7 brakes.
1984 CHEVROLET TRUCK C20 3/4 TON P/U 2WD WITH JB7, JD7 BRAKE SYSTEM
ken
--------------Parts needed to change over to 80 mm caliper's on the
front wheels are Autozone and are as follows:
2 ea
Banjo
bolt, p/n 313940, $1.99
1 ea
Caliper,
left side, p/n 90185, $12.99 + core charge ($17.00)
1 ea
right side, p/n 90184, price same as above
4 ea
Caliper mounting bolt, p/n H5004, $1.29
1 ea
Brake pad set, p/n 1534, $37.99 (these are Performance Friction carbon
metallic pads)
1 ea
Flexible hose, left side, p/n 77320, $24.99,Wagner F110424,NAPA
38563-702
1 ea
right side, p/n 77421, price same as above,Wagner F110425,NAPA
36954-726
For the brake hoses, try Raybestos # BH38563 & BH36954. You will
need
two
5/8 national fine jam nuts to attach the hoses to the bracket at the
frame.
You will have to slightly alter and move the bracket that is in the
middle
of the hose. The steel tube end that fastens to the caliper will have
to
be
bent a little to clear the upper ball joint.Denny
2 ea
bracket clip, p/n H1457, $1.29
2 ea
jam nut (don't have AutoZone number for this)
2 ea
bolt and nut, ss, ¼ x 1" (not an AutoZone item)
One of the benefits of going with an 80 mm caliper is it applies,
I'm
told, approximately 1000 psi more braking force vs. original
caliper.
The difference is noticeable.
Although there was some degree of controversy on this subject a
number
of months back, you may want to consider going to a larger master
cylinder
if making the switch to larger the calipers. If so, it's
available
from
Autozone, p/n 10166, $53.43, and does require an ~ 0.010" longer brake
rod (p/n GM 5469384)(between master cylinder and brake booster) as well
as a modified mounting bracket. If you need further details on
this
modification, let me know. Paul Bartz
HOW TO DO THE UPGRADE
80
mm
Front Brake Caliper Upgrade
Round Gauge Cluster Brake Light
The brake light that comes on in the lower right of the round
Gauge Cluster (fuel gauge at top) is not parking brake related
but
it is truly a brake warning light and should not be
ignored.
It is triggered by the proportional valve located on the left
frame
behind and above the driver's side front wheel. The
proportional
valve has brake lines going into it from the master cylinder and
out to the front and rear calipers and wheel cylinders.
There
is an internal sliding valve that should normally be centered. If
the pressure is lower in the front brake circuit the valve slide
forward and the switch grounds the wire coming into the top of
it.
The same thing happens when the back brake circuit has lower
pressure.
Marlene -- try pulling the wire clip off the top of the
proportional
valve (turn on your key) and with it disconnected the brake light
should go out. When you ground it to the frame or other
ground
it should light. It may be that you've got a short in the
wire
somewhere or you might actually have a brake problem. A
sticking
wheel cylinder could cause this. A faulty proportional valve
could
also be the problem. Internal leak in the master cylinder or just
air in the system somewhere. If you have never replaced the
front hoses you should try that first. They have a history
of collapsing internally. This could cause a higher
pressure
in the front brake circuit and trigger the light. Bleed the
master cylinder and then all the wheel lines.
Emery Stora
Stainless
Steel Brake Lines
Classic Tube 1-800-882-3711 Talk to Tim Slattery, FAX 1-716-759-1014
Disk Brake Differences
---------------------------
Leigh Harrison
- uses a huge rotor on the center axle(15 inch<?>) which
requires
a
backspacer to move the rotor inboard
- complete "bolt-on" kit
- all components cad plated
- Expensive(quality costs)
- Requires P30 master cylinder
TSM
- Less expensive
- Works with original master cylinder
- Not really a "bolt-on" - if you don't get the optional braided rear
hoses you must come up with an acceptable way to plumb
the calipers
and the braided hoses are not that great either.
- Currently limits you to a 60mm caliper
-----------
I suggest that you look at Bill Harvey's write up on the GMC
Western States web site:
http://www.gmcws.org/tech.htm#2
Also check out Heinz Wittenbecher's complete instructions on the TSM
system at:
http://www.my-gmc.com/rear.htm
Heinz later changes to the Harrison system. You can see info
on
that at:
http://www.my-gmc.com/Harrison%20Brakes/album1.html
Heinz points out that there was nothing wrong with the TSM system
but
since the Harrison system uses larger calipers he wanted to try them.
One
of the big differences is cost.
I have had the TSM system in for about 2 years now and am very
pleased
with it. I have towed my CJ-7 Jeep (over 4000 pounds of tow
weight)
up and down many mountain grades and the disk brakes perform extremely
well. I don't have an aux. braking system on my toad and I had
experienced
brake fade and vapor lock with the drum brake system even while using
the
asbestos brake shoes that I had bought from Cinnabar and I also had to
adjust the brakes frequently due to shoe wear, but I have had
absolutely
no problems once I switched to the disk brakes.
When I installed the disks I had a hard time bleeding the rear
brakes.
It turned out to be a capacity problem with the master cylinder.
The four calipers just take a lot more fluid than four stock wheel
cylinders.
My solution was to put on a larger master cylinder as shown on my
PhotoPoint
site:
http://albums.photopoint.com/j/AlbumList?u=209754
After installing the larger master cylinder they rears bled easily.
Cost was definitely a factor in my decision to use the TSM brake
system.
I used their Cadillac rear calipers with the parking brake levers since
I wanted to use my stock parking brake lever. This is a slightly
smaller caliper than the mid axle ones but they seem more than adequate
for stopping the GMC even when pulling a heavy toad. I modified
the
parking brake cable system to use pulleys instead of the wire guides
that
cause a lot of drag on the cable. If anyone needs details on
those
mods, let me know.
Jim Anstett has done an excellent job on getting the stock drum
system
to work about as well as it can, but I just feel that the advantages of
disk brakes are really great. Easy to check the pad thickness
just
by looking at them without disassembling anything, very easy to quickly
replace the pads when needed, no need to periodically adjust the rear
brakes,
and no fade or vapor lock due to the cooling running inherent in the
design
of disk brakes. It is no accident that manufacturers install all
wheel disk brakes on modern, high tech vehicles.Emery Stora
---------------------------------
76-78 Eldorado rear disk brakes
Another alternative is the "roll your own" using 76-78 Eldorado
rear disk brakes.
OEM.....
-------------------------------------------------------------
Cadilliac Rear Disk Brakes
Modification
J. R. Wright
I have uploaded the pictures for the Cadillac Disk brakes modification
for the coach. These were done at the NF rally and I have
included
the hand out
that was also available.
http://www.gmcmhphotos.com/photos/showgallery.php?cat=3119
Combination Valve
(Brass)
GM #25509419
Front brakes
Front Calipers OEM
(not over size)
Brake
Pads
Carbon Metallic (Performance Friction Co) P/N 0524
(about
$40)
New
Hoses
????? Long Toronado (2) BH36675
Rotors can be obtained from
Cinnabar for $125 each 1-800-720-2227
Rear Brakes
Mid Axle
Cyl
1 1/16" Wagner F79767
Rear Axle Cyl
15/16" Wagner F51081 OEM Size
2 sets Brake Shoes Asbestos
Only
GM #8020290/Delco -- BUY FROM GATEWAY--
Springs
#171-500
DISK BRAKE RETROFIT
-------------------------------------------------------------
P-30 master cylinder
Autozone, p/n 101668, $53.43, and does
require an ~ 0.010" longer brake rod
(p/n GM 5469384)(between master cylinder
and brake booster) as well as a
modified mounting bracket.
or
Wagner P/n
F79821
$60
DISKS, FRONT....
Parts, from Autozone front
wheels are:
2 ea Banjo
bolt,
p/n 313935, $1.89
1 ea Caliper, left
side,
p/n 90185 , $12.99 + core charge($17.00)
1 ea Caliper, right
side,
p/n 90184 , price same as above
4 ea Caliper, mounting
bolt,
p/n H5002 , $3.39
1 ea Brake pad
set,
p/n 1534 , $37.99 (these are Performance Friction carbon metallic
pads)
1 ea Flexible hose, left
side, p/n 77320 , $24.99
1 ea Flexible hose, right
side, p/n 77421 , price same as above
2 ea Flexible hose, bracket
clip, p/n H1457 , $1.29
2 ea Flexible hose, jam
nut (don't have AutoZone number for this)
2 ea bolt and nut, SS,
¼
x 1" (not an AutoZone item)
DISKS,REAR....
Eldo proportioning valve between mid and rear axles.
(Approx
$35.00)
.... 76-78 Cadillac El Dorado rear wheel backing plates ....
One option for converting to rear disc brakes is using
76-78 Cadillac El Dorado rear wheel backing plates
as the basis to mount the caliper's and elimination of
the dust shield on the backing plate is required,
as well as a slight notching of the backing plate to clear
the swing arm. The backing plate mounting bolt
holes do not need to be enlarged or moved. Machining is
only required to allow the backing plate to fit over
the axle shaft by enlarging the center hole (2.250" with
a 45 degree by 1/16" chamfer on the back side).
*** CAUTION ***
*** The Front Bogie Backing plates NEED to be
strengthened/Reinforced.
***
*** Especially if 80mm calipers are used. Lots of torque
here. ***
The back bogie can use the stock plates/calipers w/parking
brake.
The rotor requires locating and drilling three new
holes
(same size as existing) for the mounting bolts.
Additional parts, from Autozone rear disc brakes
on the rear wheels are:
2 ea Banjo
bolt,
p/n 313940, $1.99
1 ea Caliper, left front rear
axle,
p/n 90185, $12.99 + core charge ($17.00)
1 ea Caliper, right front rear
axle,
p/n 90184, $12.99 + core charge ($17.00)
1 ea Caliper, left rear rear
axle,
p/n 90557, $73.94 + core charge ($70.00)
1 ea Caliper, right rear rear
axle,
p/n 90553, $73.94 + core charge ($70.00)
1 ea caliper
bolt
p/n H5004 @ $1.29
8 ea mounting
bolt,
p/n H5002, $3.39
1 ea Brake pad set (front rear axle),
p/n 0524, $26.99 (these are Performance
Friction
carbon metallic pads)
1 ea Brake pad set (rear rear
axle),
p/n 25265, $6.49 (these are not Performance Friction
carbon metallic pads)
4 ea Flexible
hose,
p/n 77226, $9.99
2 ea bracket, left
side
p/n 3757443, $8.20
2 ea bracket, right
side,
p/n 10257203, $8.20
4 ea bracket
clip,
p/n H1457, $1.29
4 ea jam nut (don't have AutoZone number
for this)
4 ea Brake line, 3/16 x
20",
p/n H320, $2.49
4 ea
rotor.
p/n 5512, $36.94.
Emergency Brake...
McMaster-Carr (http://www.mcmaster.com/) pulleys.
P/N 3099T52 and they sell for $5.36
Total shipping was $2.17.
CBWoods
--------------------
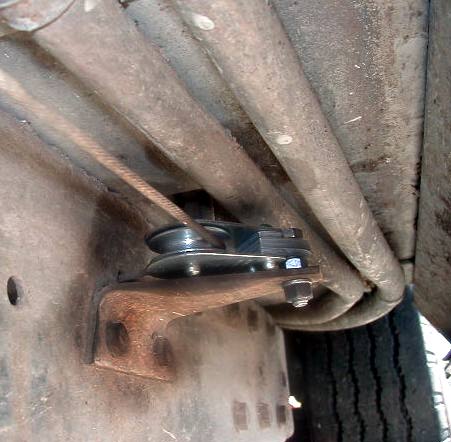
Parking Brake
Improvement
 A very simple and inexpensive improvement to
the brake cable system did improve the holding power of my
brakes.
I replaced the
hooks that hold the cable where it passes through the frame (both
sides)
with heavy
duty pulleys bolted to the clips that the hooks were attached to. I
un-did the
connection on both sides where the cable attaches to the "U" near the
rear wheels,
passed the cable through the pulley and bolted the cable back in place
----- just
enough cable to still make the connection. This eliminates a lot of
the friction in the
emergency brake system. My coach now holds on my driveway and
all of you who have
visited will agree that it is STEEP. If any one is interested
I have a source for
the "perfect" pulley ($12 for the pair). Gary
Let me add a few things that I have been asked on this
subject:
1) The "special pulleys" are special only in the sense that
they
fit and are rugged.
The ones I used came from a logging supply store and were marked "Block
Division,
Wichta Falls, Tx, 525#". They are 3" from the center of
the mounting eye to the extremity
of the pulley wheel -- just the right size to mount on the existing
bracket.
They are galvanized laminated construction. Now available from
Scott
http://members.aol.com/adohen1/page/Adohensupply.htm
Ahohen Supply Co.
2) The OEM installation of the brake cable had a hook rod on
the
interior of the passenger
side frame to route the cable away from the OEM muffler. I have a new
muffler system and
this rod is not needed so I removed it. If you need to keep the
rod in order to clear the muffler
then a third pulley can be hung on the rod if it is shortened a few
inches. This will eliminate friction at this point.
3) I think that the "emergency brake" should be more properly
called a "parking brake".
Mine does hold on a fairly steep incline but I have no trouble
overpowering
it with my 455
and I sure would hate to have to depend on it to stop in an emergency
situation.
4) The addition of a vacuum pump to the brake booster is a
must
in my books.
Gary
Enhanced Booster
Product
description by Leigh Harrison (see link below)
Benefits: Great performance enhancer
to the Brake Master Cylinder Kit /
Old Vacuum boosters required 75lbs pedal pressure to activate
valve.
Sensitized Booster initiates valve at 15lbs, and is fully activated at
25lbs pedal pressure.
No sending back your old booster for push rod.
HORROR STORIES OF LOST BRAKES
http://gmcmotorhome.info/addens.html#story
SENSITIZED BOOSTERS LEAK VACUUM
(Kills a Vacuum tank Idea)
Well, I might have known, Gene & Emery are RIGHT! Another of
those ASSumptions, or believing something heard!
I connected a vacuum gauge to the accessory port on my vacuum
reservoir. Cranked the engine and got 20"Hg. Shut the engine down
and waited about 3 minutes -- still had 20"Hg. Put my foot on the
brake. The vacuum dropped about 2"Hg immediately, then continued
to drop at about 0.5"Hg per second! Mind you, that's with the 4"x30"
reservoir! Without it the rate would be much higher.
Among the variations of the test I conducted was to run the engine, put
my foot on the brake, and turn the Cadillac suspension
compressor/vacuum pump on. The pump WAS able to hold 20"Hg vacuum
and to recover it if I cycled the brake.
With neither the engine nor the pump running, the pedal rose slowly,
almost imperceptibly, as the vacuum decreased. I was, frankly,
surprised on the first trial, to find that it had moved: I
thought my foot was at the same level as when I first applied the
brakes, until I released and reapplied the pedal and found that it went
down only a little way.
I'm disappointed and baffled by this situation. For all my power
brake driving years -- at least 50 of them -- I've thought the vacuum
was trapped with the pedal down and would hold the brakes indefinitely.
'Tain't so!
The need for the reservoir is now more acute than I had any idea --
that controlled leak means that the fabled 2-3 brake applications must
be quick, short ones because one long one will deplete the vacuum.
And "long" will be pretty short.
An electrically driven pump also makes even more sense than I realized
-- that's the only way to extend the boosted brake application time
beyond about 30 seconds! :-(
Unless all of us have defective boosters. KenH
****************************
SOME SOURCES FOR SENSITIZED, BOOSTERS
Sensitized so that it takes less peddle pressure to get full
braking.
LAMEY ENTERPRISES Ontario, CA - (909) 983-7872(909) 982-7747
$175 plus shipping, exchange or a core charge of $100
Carolina Classic Trucks
http://www.carolinaclassictrucks.com/PB11504RV.html
Applied GMC
http://www.gmcrvparts.com/prod.itml/icOid/612
Leigh Harrison
http://www.leighharrisongmcmotorhomeupgrades.com/SensitizedVacuumBooster.html
MBM
http://www.mbmbrakeboosters.com/index.php?page=shop.product_details&flypage=mbmflypage.tpl&product_id=149&category_id=14&option=com_virtuemart&Itemid=6
Master Cylinder:
mfg. Wagner
P/N F79821
Size 1 1/4" piston
OEM 1970+ Chevy 1 ton Truck
Cost $60 new
Warranty Lifetime (Keep
receipt)
If your parts supplier can not get a Wagner, then he can cross
reference
to local brand. Don't get stuck with a rebuilt one, not worth
taking
home & small difference if bought Right. This is a perfect
fit
for all '73 thru '78. It's best to bleed the master cylinder on the
bench
before
installation. Better chance of getting all the air out of the
fluid. My Wagner has been on my coach for approximately 9 years w/o any
problems. Coach stops good with OEM brakes & with Brake Guard.
-----------------------
The part # for the new master cylinder for standard brakes is (MC39075)
(NAPA #39705 ). That is a Raybestos number and bolts right
on.
I sell them for $65 no exchange, they are new. You can use your
old
one as a wheel chock!Jim Bounds
----------------------
Sinking Pedal Syndrome
I have not experienced the "Sinking Pedal Syndrome" but have heard
of
several GMCers that have. It's not a bad master cylinder
typically,
but
a bad procedure of bleeding the air out of the master cylinder before
installation (extensive bench bleeding required). What happens
when the
air is not completely removed from the master cylinder is that the
air
will slip past the piston in the master cylinder & the pedal will
slowly
go to the floor. After master cylinder removal & an
extensive bench
bleeding, all is well without exchange of the master cylinder.
I always have done "Bench Bleeding" of a master prior to installation
&
therefore never seen this Syndrome. Next time try to get all
the bubbles
(even the tiny ones) out of the master cylinder prior to installation
&
you will find gone is the Syndrome.
The procedure to determine if you have the "Sinking Pedal Syndrome"
is to
start the engine (Vacuum Booster operating) & press hard on the
brake
pedal for 60 seconds or so & if the pedal starts to slowly sink
then you
have it.
Power of the "Net" illustrated again !!!!. Duane Simmons
------------------
WHAT MASTER CYLINDER TO USE FOR DISK BRAKES
BY
EMERY STORA
During October 2006, in an effort to find a master cylinder
that worked better with my 80 mm front calipers and six wheel disk
brake calipers in the rear, I replaced my P-30 master cylinder with a
34 mm GM. I used a CarQuest 20-2234 (which corresponds to a GM
14009146). It is working very well for me while using the original
brace PLACED BETWEEN THE MASTER CYLINDER AND THE BOOSTER. You have to
flatten the bolt hole tabs a little to have a good fit against the rear
of the master cylinder. It gives plenty of clearance between the end of
the master cylinder and the front door. It also has the metal reservoir
instead of plastic ones that I have also seen.
The GM 14009146
master cylinder crosses to an AC/Delco 174-834, a Wagner F-103239,
Bendix 11641, ElS E150063 and a CarQuest 20-2234. This is a 34 mm
piston bore (approx. l-2l/64”). This fits a 1977-96 P35/P3500 Van (with
4 wheel disk brakes) and a P-30 Van. It also fits a 1991 C3500 Pickup.
It will give sufficient volume for the use of 80mm front calipers added
to the front wheels of the GMC and for 4 calipers added to the rear
wheels. It will
fit behind the front cover (below the windshield) without any
modifications to the cover or the necessity to shim the hinges.
This
master cylinder has a l/2x20 threaded port for the front chamber and a
9/16x18 threaded port for the back chamber. NOTE: the original GMC
motorhome master cylinder had the 1/2 in the back and the 9/16 in the
front. So it is necessary to move the 9/16" (rear brake line) to the
rear chamber and the l/2” (front brake line) to the front chamber. This
is not a problem as this master cylinder has two chambers that are of
equal size - unlike the original one that has a smaller front chamber
that went to the rear brakes.
My write up from 2004 on this site
details my use of a P-30 master cylinder with a 1-5/1 6" bore. Ignore
that information now as II have now replaced it with this 34mm master
cylinder.
I have found that my original master cylinder brace
fits just fine BEHIND the master cylinder (between the booster and the
master cylinder) so it was not al all necessary for me to fabricate a
new brace. To release the rear clip on the cover of the master cylinder
just push it with a screwdriver and it will move off the cover to the
rear. It can be tightened back on by using a screwdriver to one side to
pull it back on. I experimented with the rod length and find that a rod
with a length of 2.63" works fine. I used a piece of drill rod the same
diameter as the original rod. I ground a spherical shape on the end
that goes into the master cylinder and just chamfered the flat end that
fits against the booster.
This setup gives me very good pedal and good stopping power.
Emery Stora
How the Master Cylinder Works
Rick Staples
A so-called "dual" master cylinder (like ours) has one piston
attached to the pedal, and another floating piston further down
the
same bore. As you depress the pedal, the primary piston
passes
the compensating port (little hole connecting to the reservoir)
and
starts to build up pressure. Fluid is lead from this
chamber
of the cylinder via a pipe to one set of brakes. Pressure
in
this primary chamber also presses against the secondary (floating)
piston,
and IT moves down the bore, passing ITS compensating port and
building
pressure in the secondary chamber, where another pipe leads to the
OTHER
set of brakes.
If either set of brakes (front or rear in our case)
springs
a leak, the corresponding chamber empties, and that piston
"bottoms
out". If it is the primary piston, it moves down until it
physically
touches the secondary piston, and now pressure is applied
directly
to the secondary piston. If it is the secondary chamber
that
empties, the secondary piston bottoms at the end of the cylinder
bore, and pressure builds up between the two pistons in the
primary
chamber. In either case, THEORETICALLY you still have
the
remaining half of the brakes. (In fact, the DOT required
manufacturers
to install a brake warning light to remind the poor befuddled
driver
that a failure had occurred, since this system worked so well we
might not notice the problem otherwise!)
HOWEVER, in the real world it doesn't work that
well.
Usually the problem is brakes which are out of adjustment, have a
little air trapped in lines or cylinders, or spongy hoses,
etc.
Any/all of these things cause a low pedal. When one of the
sets of brakes fails, you lose about 2/3 of the pedal travel
before
its piston "bottoms out". If the remaining brakes are a bit
low/spongy, then the pedal hits the floor before the remaining brakes
fully
apply. (Your case.) Sometimes pumping the pedal will bring
it up enough to work, but the GMC is hard to pump
effectively.
Also, the GMC brake system works hard even if it's all there, so
any failure is more dramatic than in your car.
BTW, the warning light/proportioning valve has little
or
nothing to do with all this, except as another place to trap air
bubbles, or as as a potential leak between front and rear systems
which might circumvent the intended separation.
-------------------
Maintain the OEM brakes
with the
following: (11/23/06)
Best to use Performance Friction Company's Carbon Metalic pads for best
stopping ability & much....much less wear on the Rotors. Auto
Zone Parts house carry our pads (0524) in stocks for ~$26 with a
written
999 month warranty...Best Deal in town if you have a Auto Zone
Store.Duane
Performance Friction # 524 (0052.10) and #6144 (0614.3) both fit our
calipers and the
80
mm.calipersDenny Allen
Front brakes
Front Calipers OEM
(not over size)
Brake
Pads
Carbon Metelic (Performance Friction Co)
Pad
P/N
0524 (about $40)
New
Hoses
????? Long Toronado (2)
BH 36675 is the correct Raybestos number for our coaches. Other numbers
are Wagner F86578, Autozone 88498, Carquest or EIS# SP5363. These also
fit 70-78 Toronados. If the parts guy asks "which side?" the answer is
the right side. The Toronado left hand side ones are to short for our
coaches.
Brakeware 77320 & 77421 are the p/n's for the left and right
hoses,respectively. According to AC Delco reverse lookup,
93 Chevy P30 van (or 586 others) is an application. You'll need
banjo bolts to go with those also. Ken H. (11/23/06)
I called my local AutoZone in Santa Fe and these numbers, Left
77320 and Right 77421 are correct numbers and they have both hoses
in stock. The price here is $24.99 each plus sales tax. Emery
Stora 11/23/06)
The pads fit the same year Toronados. I prefer the "Performance
Friction" brand of carbon metallic material and their number is 524
with 6144 as a second choice. The 6144 has a little more friction
material so should last a little longer.Denny Allen (8/22/05)
Rotors can be obtained
from
Cinnabar for $125 each 1-800-720-2227
Rear Brakes
Mid Axle Cyl
1 1/16" Wagner F79767
Rear Axle Cyl
15/16" Wagner F51081 OEM Size
2 sets Brake Shoes Asbestos Only
GM #8020290/Delco -- BUY FROM
---------------
Gene, and all who may need this info. I just put new 15/16" Wheel
Cylinders on my 3rd axle.
Here are #'s take right off of the box
Dorman W51081
Which replaces (as noted on the Dorman box)
Coniseal WC13469
Raybestos WC37048
Wagner F51081
Bendix 33469 LARRY 10.27.13
GATEWAY-- #171-500
John Evans 2455eva@pce.net
he has the carbon met shoes,
he also has front pads if you do not have a Autozone, no cores needed
Try calling him at this # 716-652-6868
George.
Springs
New Sets
Combination Valve
(Brass)
GM #25509419
The proportional valve is available at GM Dealers under
part#1236004.
I just got one last month.
They might have to order it. As for bleeding I pulled the valve
out not in. The real question is that do you have air in the master
cylinder
and if you do then you will not get any fluid to the rear brakes.JR
MASTER CYLINDER
-------------
In doing my brakes a few years ago I ran into the poor to very poor
and bad "STAR" adjusters on the rear brakes. This coach is made
to
be self adjusting when you back up. Of course the self-adjusters will
not
work properly or at all if the "STAR" is not in servicable
condition.
chuck
[INDEX] | [SUGGESTIONS]
 A very simple and inexpensive improvement to