 Old
bushings removed, holes cleaned up
Old
bushings removed, holes cleaned up
The Moog number for the offset upper bushing is K-7104.
The number for the regular bushing is K-7006.
Here's a P/N and price update:
All are NAPA part numbers:
Lower Ball Joints
260-1392 $120.00 per pair
Upper Ball Joints
260-1126 $ 78.00 per pair
Lower Bushings (set of 4, 2 per arm)
267-3299 $ 86.00 per set
Upper Bushings (set of 4, 2 per arm)
267-1368 $ 53.00 per set (Offset)
About $340.00 plus tax if you upgrade to 3/8 bolts.
The first set of lower bushings I purchased from NAPA were too big and
too long. The boxes had the right P/N and had never been opened.
This is a packaging error from DANA Corp. It pays to bring one of
the original parts with you when you buy new ones. NAPA resolved
this by ordering from a different distributer in hopes of getting them
from a different batch. It worked.
I was told by my local counter guy and long time friend that
there's only two Mfr's left making these parts, MOOG and DANA. You
could get either in the same box.
After my last "on the coach" rebuild and subsequent alignment,
I recommend using the offset style upper bushings. They offer an
extra degree or two of castor adjustment if needed.
The cam bolt kits are available from Moog. Moog part number K5266.
This
kit has two complete bolt and cam sets. That would be enough for one
complete side (a-arm).( Two kits required for a complete front end
job.) Gil
Old
bushings removed, holes cleaned up
The arm was spread a bit making it difficult to remove, I did
have to pry it out but it wasn't too difficult as the old bushings were
really in terrible shape. Reinstalling the control arm tends to try
one's patience though. That front hole is a stinker to line up.
I slightly lodged one side in place, put some etaiii on the ball joint
end and tapped the side in
with a leather mall. It actually wasn't as difficult as some
I've done.
The torsion bar won't drop out unless you remove the 4 bolts holding the rear retainer in place, then just rotate the disconnected control arm forward while tapping with a leather/soft mall and the bar will fall out. Really a two person job because of the weight and length of the bar.
Didn't use a bar to remove the bushings. Even though they're
two or so inches long, the press fit doesn't come into play until the bushing
is all but 1/2 inch into the arm. Using the impact tool with a chisel
attachment is all you need Just sort of work your way around
the lip of the bushing until you can raise it enough to get it started
out of the
hole. Keep going around the bushing lifting one side then the
other. They come out quite easily this way. By the time you
get it about 1 inch out of the arm, you can pull it out the rest of the
way with your hand. Snap-On, or CP. Any type of air chisel
tool works. You just need a chisel and a blunt attachment.
I used the same impact wrench with a chisel attachment (to remove the
bushings). After a couple
of hits the chisel lifts the flange part of the old bushing just enough
to allow you to get under it & work the bushing out. Easy does
it while working your way around the outer diameter of the bushing.
It's the only way I've ever been successful at getting old bushings out.
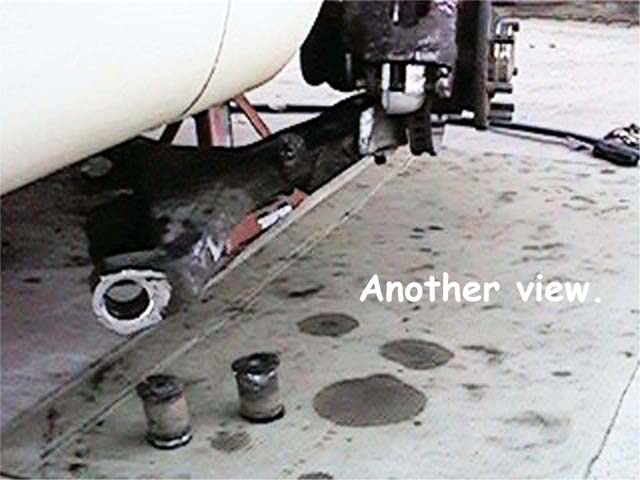 Another
view of the prepped control arm
Another
view of the prepped control arm
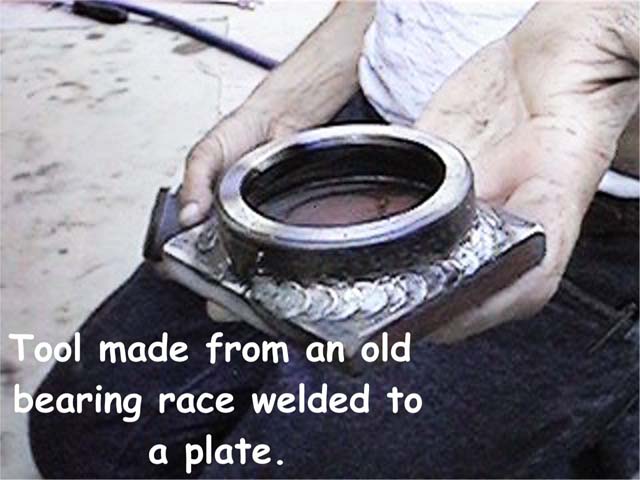 The
tool made from an old bearing race welded to a steel plate
The
tool made from an old bearing race welded to a steel plate
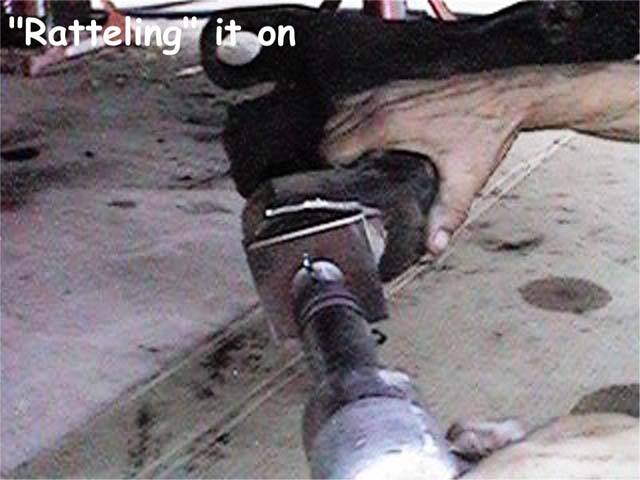
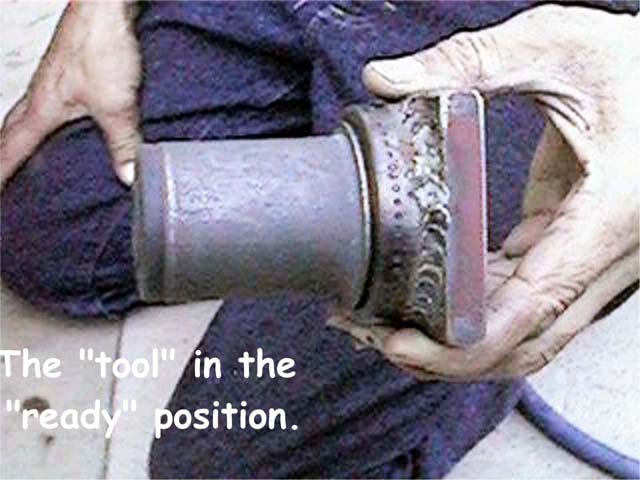 The
"tool" slipped over the end of the bushing
The
"tool" slipped over the end of the bushing
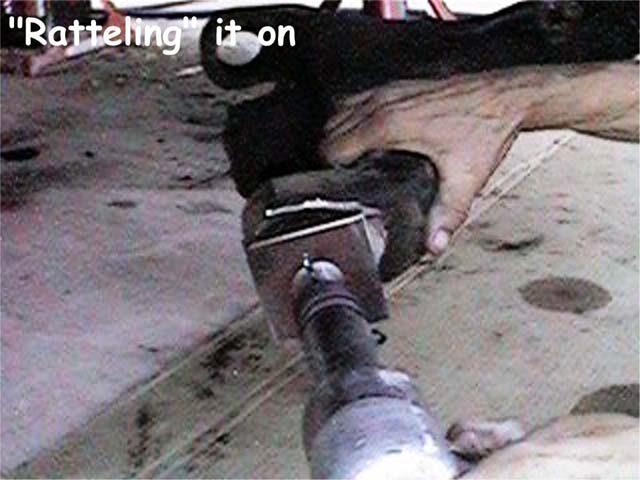 Bushing
in place, impact wrench with blunt tool ready to start
Bushing
in place, impact wrench with blunt tool ready to start
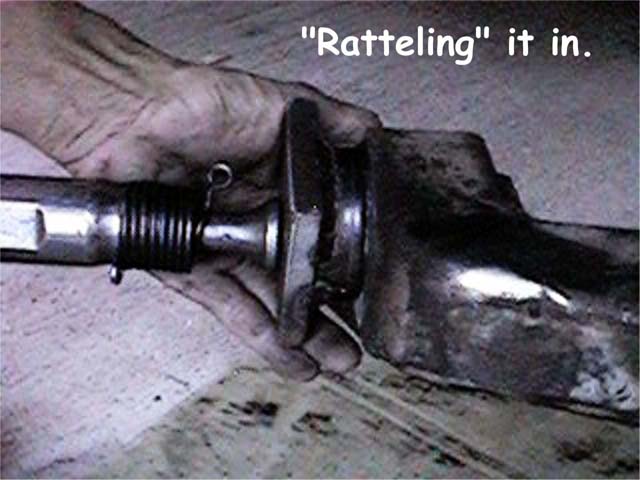 On
the way in.....
On
the way in.....
 Almost
there
Almost
there
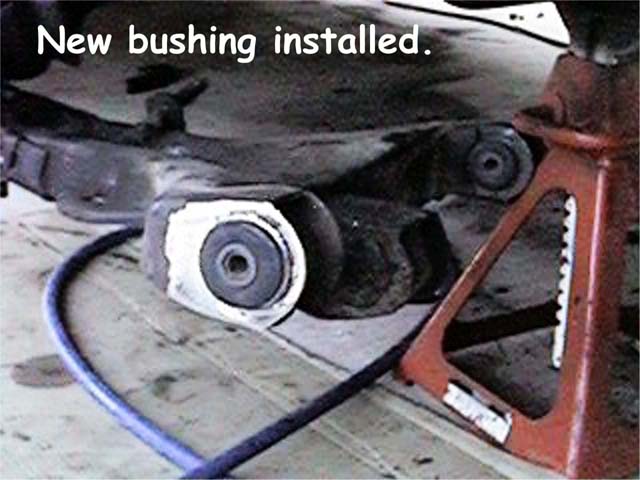 All
the way home with the flange flushed up & square with the control arm.
All
the way home with the flange flushed up & square with the control arm.
Total time for both, about 20 minutes.
Q--how did they keep the lower arm from distorting while installation
of bushings, this can be hard to do without
the proper tooling some times.
A--- It's not necessary because you're not pressing them in. We
were successful by holding the arm in one hand & using the air tool
in the other. I guess it's the same principle as removing a lug nut
with an impact tool when the wheel is suspended. It's nearly impossible
to do it the same way with a breaker bar unless the vehicle weight is on
the
tire.
Q-- I need more detail
A---Work the tip of the chisel under the metal lip (not rubber) all the way around the bushing. As soon as it starts to lift work the tool under the lip & push outward, away from the arm. You don't have to do this full force, you can hold back on the impact tool trigger & let the tool do the work. Once you get it out about 1/2 inch or so it will pop out the rest of the way quite easily. It'll go fast after the first one.
The bushing is nothing more that a steel sleeve with a flange on one
end. It is also slightly larger in diameter at the large/flange end.
The rubber is vulcanized to the inside of this sleeve, then another sleeve
is vulcanized inside the rubber. The bolt passes through this sleeve.
It doesn't matter which end you are looking from or to (away from or towards
the ball joint) the bushings are pressed in from the outside of the arm
towards the inside. (Or towards the shock if that helps.) Working
against the rubber will not produce any results. The press fit is
between the sleeve & the arm. Once you get one out it will all
make sense. By the way, if you buggar it up so bad that you
can't get a grip on the flange with a chisel tip, I have in the past used
the 'ol flame wrench. Heat those suckers up with a torch till the
rubber catches fire & melts out, all that will be left is
the sleeve in the arm and you can operate on that by sawing a small
slit lengthwise & twisting out the sleeve. Heat will NOT hurt
the arm.