|
Contact me for prices and availability
Front Window Screens
More information and installation instructions
. .. .
. .
.
.
.
.
.
.
Wind Wings

I have made the following colors, but others colors could
be made.
Solid - Black, White, Light Blue, Dark Blue, Brown
See thru - Clear and Smoked.
.
.
.
.
.
Through the Bumper Trailer Hitch Receiver

Easy installation. It fits like a glove and usually doesn't interfere
with OEM GMC floorplan sewer drains
. .
.
.
. .
Lower Radiator Guard
Made of 1/8 flat expanded metal with openings of 5/8 by 1 5/8, backed
up by 1/4 inch wire cloth.
Includes a plastic safety edge guard and stainless steel fasteners


. .
Instructions For Installation of GMC Wings
1. Temporarily attach the Wing to the assembled bracket.
2. Center the Wing in the opened window and hold bracket against coach
rail, mark the lower mounting hole.
3. Drill a #29 hole one half inch deep and tap using a 8-32 tap.
4. Remove Wing from bracket and attach bracket to coach, then located
top hole. Swing bracket aside, drill and tap top hole.
5. Finish mounting bracket to coach as shown in picture (pivot screws
should be pointing down).
6. Attach the Wing to the bracket but do not overtighten the wing screws.
7. Adjust pivot screws just tight enough to hold position.
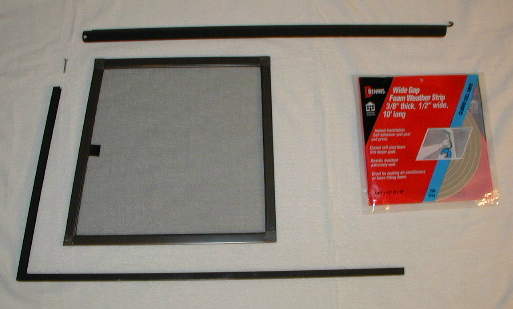
Instructions for Installation of Window Screens
The same procedure is used for both the driver and passenger side:
The kit consists of the following pieces for each
side
- screen
- top screen rail
- joined bottom & front screen rail
- (2) screws
- strip of foam - cut into 4 pieces approx. 12" long (see
step 2) |
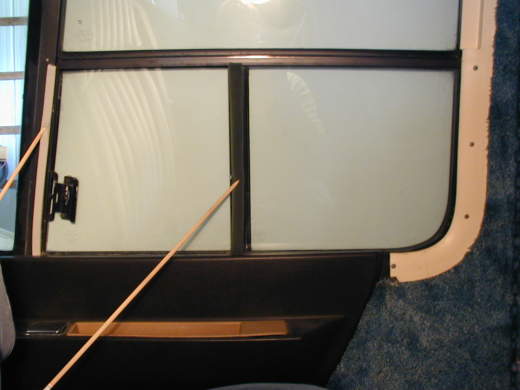
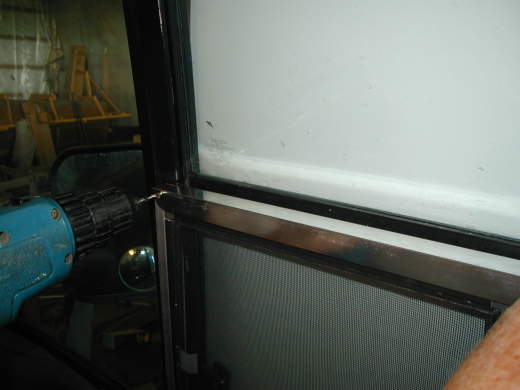
Picture 1: Remove the bottom screw in the window trim
(next to the armrest). Note: this screw may need to be replaced
with a longer one once the screen rail is in place. Then remove
the tape from two foam pieces and place one on each vertical member
of the window frame (shown by the pointers in the photo).
 |
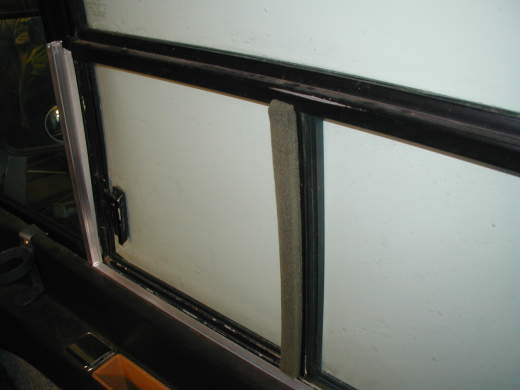
Picture 2: Pull armrest towards you so that you can
tuck the bottom rail of the screen between the armrest and the window
rail. Then position the front rail of the screen frame with the
vertical rail of the window. (Note that the screen frame is shown
as silver for clarification)
 |
Picture 3: Place the screen in the bottom rail of the
screen frame and up against the front rail.
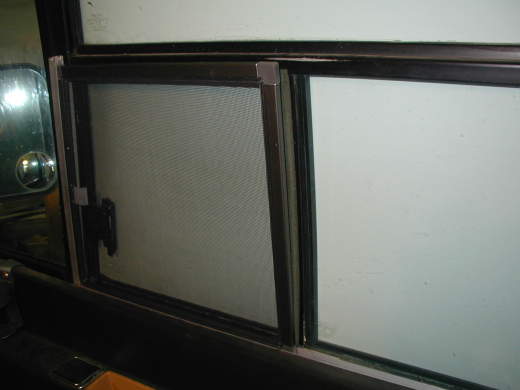 |
Picture 4: Place the top screen rail such that the end
with the bend goes into the window frame tunnel.
 |
Picture 5: Match the hole in the top rail with the hole
in the front rail. Then using these holes as a guide, drill a size
#29 (.136 diameter) hole 3/8 inches deep into the window frame.
Then tap the hole using 8-32 tap to the same depth. Install screw
into hole to secure the screen frame. Then reinsert the screw for
the window trim that was removed in step one. If it is not long
enough, you will need to get a longer screw (not provided)
 |
Repeat same procedure for the other side
|